Installing the New Internal Case Fan
Overview
One of the newest additions to the gMax 2 is the inclusion of better internal case cooling! Below is a step by step instructional on how to convert and install your electronic case cooling system.
Step 1:
Power down your machine. Using a 3mm hex key, unscrew the 4 bolts on the Electronics Case.
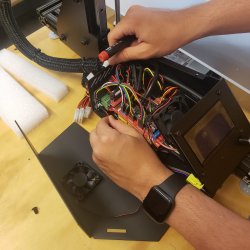
Step 2:
Remove the Electronics Case cover gently and lay it down next to the printer. Disconnect the case fan power wire from the electronics PCB board.
Step 3:
Unscrew the bolts holding the Case Fan to the Electronics Case Cover. Since they are secured with a lock-nut, you will need both pliers and a 2.5mm hex key to remove them.
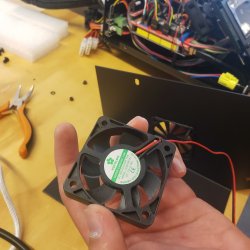
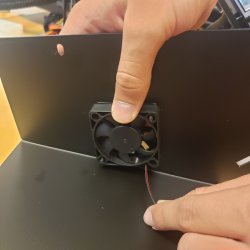
Step 4:
Insert the included fan gasket
Step 5:
Invert the orientation of the fan and install it.
NOTE: The label should be facing the cover. The wire should be in the orientation shown below.
Locate this M6 bolt inside your electronics case
Step 7:
Remove the M6 bolt using a 5mm hex key.
NOTE: Be careful not to move the inserted T-Nut. If the position of the T-Nut is moved, you may lose the ability to screw the bolt in.
Step 8:
Using the M6 bolt that you just removed, install the Internal Case Fan system.
Connect the Internal Case Fan power wire.
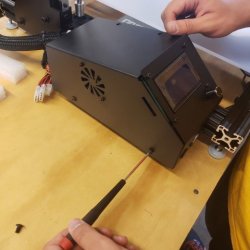
Step 10:
Secure the power wire using the supplied zip tie so it isn't in the path of the fan. Then reinstall the Electronics Case Cover.
After you have finished installing your new cooling system, turn on the printer, and make sure it works! The fan on the Electronics Case Cover should act as an exhaust fan, while the internal case fan is actively cooling the stepper drivers directly. This should increase the performance and the durability of your machine.
Happy Printing!
Attachments
-
 360 KB Views: 314
 -
 250.5 KB Views: 308
 -
 186 KB Views: 311
 -
 104.5 KB Views: 307
 -
 282.2 KB Views: 303
 -
 37.1 KB Views: 305
Last edited: