Replace the original print head with E3D-v5 All-Metal print head.
Since then they've released a new v6 version with slightly smaller footprint and better fan holder, which should make replacement a tiny bit easier.
There were only four things to take care of, and one optional step.
The optional step is an additional screw to hold the print head to the X-axis carriage because of the additional weight.
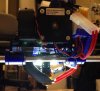
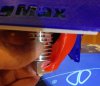
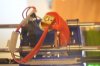
Original Head
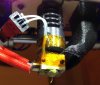
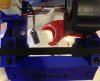
Original Head 2
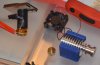
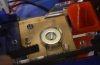
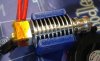
Comparison of Original & E3D All-Metal print heads
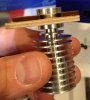
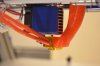
Notice the two pieces of wood holding the gMax print head are slightly thinner than the E3D's mounting groove.
Since then they've released a new v6 version with slightly smaller footprint and better fan holder, which should make replacement a tiny bit easier.
There were only four things to take care of, and one optional step.
1) Thicker wood support needed to support E3D
2) Washer needed to fill gap between E3D and extruder motor
3) Longer cooling shroud needed
4) Additional E3D cooling fan needs power
The optional step is an additional screw to hold the print head to the X-axis carriage because of the additional weight.
Original Head
Original Head 2
Comparison of Original & E3D All-Metal print heads
Notice the two pieces of wood holding the gMax print head are slightly thinner than the E3D's mounting groove.
Attachments
-
 230.2 KB Views: 3,621
 -
 233.2 KB Views: 3,621
 -
 90.4 KB Views: 3,621


")