Hey everybody.. I wanted to contribute to the forum and add some pics of my upgraded gMax. When I received it I already had a working Makerbot Replicator 2 so I decided I would spend some time tinkering with the design of the gMax and make some parts. I thought a few things could use improving upon for my needs and after seeing the Double Wide upgrade post I was motivated to make my own modifications. I was also pleased to see that gCreate was working on similar upgrades as well so I thought it shouldn't be to bad to undertake some changes.
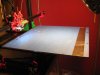
Overall, I was happy with the X and Y bed size dimensions but I wanted to at least double the Z. I also wanted to solve for the bed sag caused by using the acrylic sheet the way it was.
Here are some things I changed.
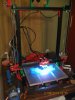
I think that's mostly it. With the new design everything is very rigid and has been working out pretty well so far. I printed to small test cube for calibration purposes and then went to a 17" dagger for the heck of it. Dagger got about 11" up before I had filament issues.
Feel free to ask questions.
Sorry for the terrible pics.")
Overall, I was happy with the X and Y bed size dimensions but I wanted to at least double the Z. I also wanted to solve for the bed sag caused by using the acrylic sheet the way it was.
Here are some things I changed.
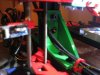
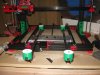
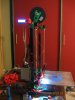
Vertical uprights extended to 32" resulting in a 22" print height
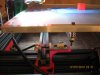
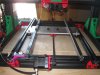
Epoxied original aluminum rails for holding bed, to the outer edges of the bed itself so its flat.
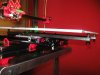
Bought new U channel at Ace and used them for attaching the bed to the carriage
Moved the carriage rails to the outside of the carriage to widen the support.
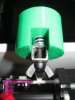
Designed and printed new Z support mounts that press fit into extruded alu frame channels
Designed and printed new Z motor brackets
All EXISTING wiring is used. I did not need extensions which was awesome.
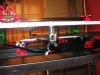
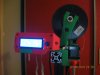
Mounted the power supply, control box and LCD panel on one of the Z uprights so that cabling fit everywhere properly.
Designed and printed new X and Y endstop switches to fit the new mods
Designed and printed adjustable spool holder for the top cross member
I think that's mostly it. With the new design everything is very rigid and has been working out pretty well so far. I printed to small test cube for calibration purposes and then went to a 17" dagger for the heck of it. Dagger got about 11" up before I had filament issues.
Feel free to ask questions.
Sorry for the terrible pics.
Attachments
-
 216.6 KB Views: 3,975
 -
 205.3 KB Views: 3,975
 -
 165.9 KB Views: 3,974