Follow these steps to level your dual extruder relative to the bed.
Step 1: Run the gCreate Files>Dual Extruder>Dual Extruder Leveling gcode file. This file will print two lines, one for each hotend. This will help determin if one hotend is lower than the other. The lines should be the same width from one nozzle to the other. If they are, no need to continue.
Step 2: Ensure the x-axis is level. Go to Prepare>Auto Home. Then Prepare>Disable Steppers
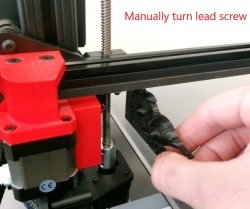
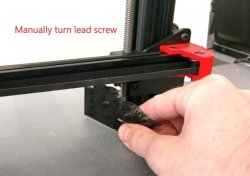
Step 3: Use the gMax First Print print from the getting started guide to slide under the left and right side of the x-axis arm. Then manually turn the lead screw until both sides touch the print.
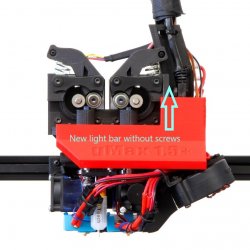
Step 4: Remove the bolts holding the LED light bar in place. For printers shipped after 8/8/2017, The LED cover design has changed. To remove it, simply slide it up
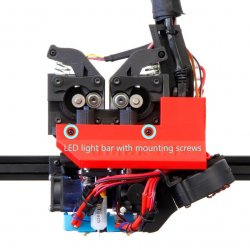
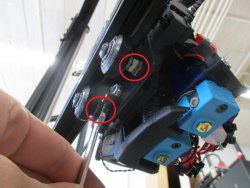
Step 5: Locate the 3 screws in the diagram below. Loosening these screws will allow you to tilt the extruder to left or right. Once you are happy with the position, tighten the screws to lock it in place.
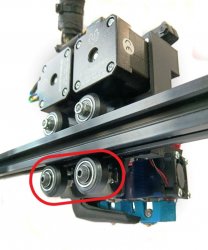
Step 6: Additionally, you may need to adjust the eccentric spacers on the x-axis plate. Adjust the left or right spacer will tighten the wheel against the rail, but also tilt the extruder. Use an M8 wrench to turn the spacer
Step 7: Run the test file again to see the results.
Step 8: If the extruder is now level, re-install the LED light bar.