Here are the steps to replace a broken or worn Y-axis GT2 belt
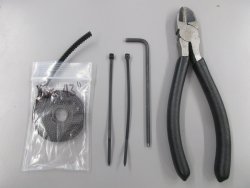
To change the Y-axis belt, you will need 43" of GT2 belt, (2) 4" zip ties, a 3mm Allen wrench, and a pair of wire cutters.
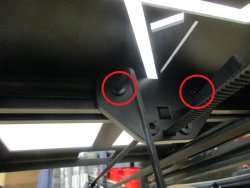
To start, you will want to remove the endcaps on the back of the v-slot rails. Then disconnect the Y-axis bed plate and slide the entire bed off the back of the printer.
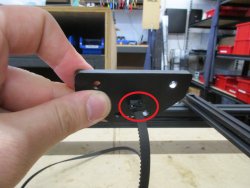
You will then need to remove the double t-nut holding the belt in place. Then pull the excess belt out of the Y-axis plate
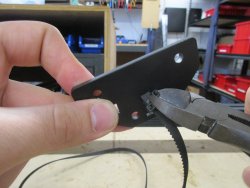
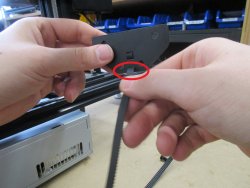
You will then need to clip the zip ties holding the other end of the GT2 belt in place. Once clipped, you can pull the GT2 belt out of the Y-axis plate. You can now remove the old belt from the pulley and drive gear.
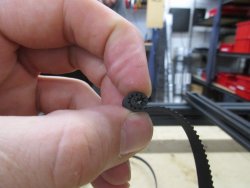
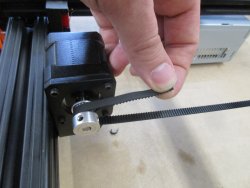
When you are ready to install the new GT2 belt, curl the end up before trying to insert it into the rear pulley, this will make it easier to wrap it around the pulley. Make sure to insert the belt through the top of the pulley with the teeth of the belt facing down.
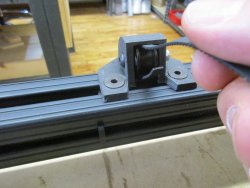
You will then pull the belt towards the drive gear. Make sure the belt goes under and over, with the teeth facing the drive gear.
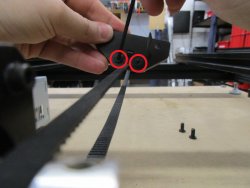
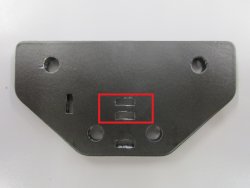
With the belt in place, you will want to thread the GT2 Belt through the top two belt slots of the bed plate. You will need about an inch of of excess belt to come through when pulled tight.
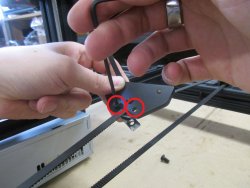
At this point, you will use the two zip ties to hold the GT2 belt together. With the teeth of the belt facing each other, it will lock the GT2 belt in place and prevent slipping. You will then want to clip the excess zip tie.
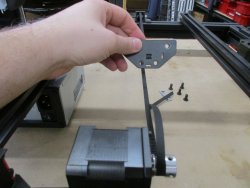
Now you will insert the other end of the GT2 belt through the bottom belt slot on the bed plate. You will want to pull this tight to remove any excess slack in the belt.
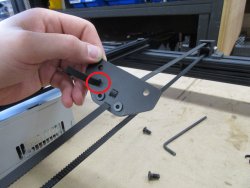
While holding the belt tight, you will need to reattach the double t-nut to hold the belt in place. Then insert the excess belt through the side belt slot on the bed plate to prevent it from dragging on the GT2 belt and causing skipping.
The final step will be to slide the aluminum bed back onto the printer and reattach the bed plate.